















Categories
Media Wall Mistakes to Avoid (and How to Get It Right First Time)
⏱️ Time to read:
12–18 minutes
Most media walls look great on Instagram… but feel completely wrong in real homes.
The difference between a stunning, room-defining focal point and an awkward, bulky eyesore is almost always planning — not budget. If you get the proportions, technology, or sequence of your build wrong, you’ll be staring at that mistake every time you sit down to watch TV.
Here are the 7 most common media wall mistakes homeowners make, and exactly how to avoid them so you get it right the first time.
🧠 Quick Answer: What are the most common media wall mistakes?
The biggest mistakes are getting the proportions wrong, choosing the fire too late, and prioritising price over flame quality. Most issues come down to poor planning — not budget.
To get it right the first time:
- Keep the design simple and well-proportioned
- Choose your fire before building the wall
- Match the fire width to your TV size
- Invest in realistic flame technology
🔑 Key Takeaways
- Start with the fire, not the wall: This decision controls everything — size, proportions, and overall look.
- Get the proportions right: Aim for a fire that’s 70–100% of your TV width. When in doubt, go wider.
- Don’t compromise on flame quality: Cheap flame effects will undermine the entire wall, no matter the build quality.
- Plan your layout around real use: TV height, viewing distance, and spacing matter more than aesthetics alone.
- Keep the design simple: Clean, wide-format layouts age better than overcomplicated feature walls.
- Choose a fire designed for media walls: Look for front heat output, proper clearances, and installation compatibility.
📍 Jump to section
Short on time? Jump straight to the mistake you want to avoid.
- Mistake 1: Getting the Proportions Wrong
- Mistake 2: Choosing the Fire Too Late
- Mistake 3: Cheap Flame Effect
- Mistake 4: TV Placement That Feels Off
- Mistake 5: Ignoring Heat & Venting
- Mistake 6: Overcomplicating the Design
- Mistake 7: Treating It Like a DIY Feature
- The “Get it Right First Time” Framework
- Before You Build Your Media Wall
- What to Look for in a Media Wall Fire
- Top Features to Look For
- Your Build Starts With the Fire
- Media Wall FAQs
❌ Mistake 1: Getting the Proportions Wrong

The most glaring mistake in media wall design is a mismatch between the size of the television and the size of the fire. A tiny fire under a massive TV makes the room feel top-heavy, while a wall that is too chunky for the room swallows your living space.
A 65-inch TV with a 900mm fire looks disconnected — like two separate features fighting for attention.
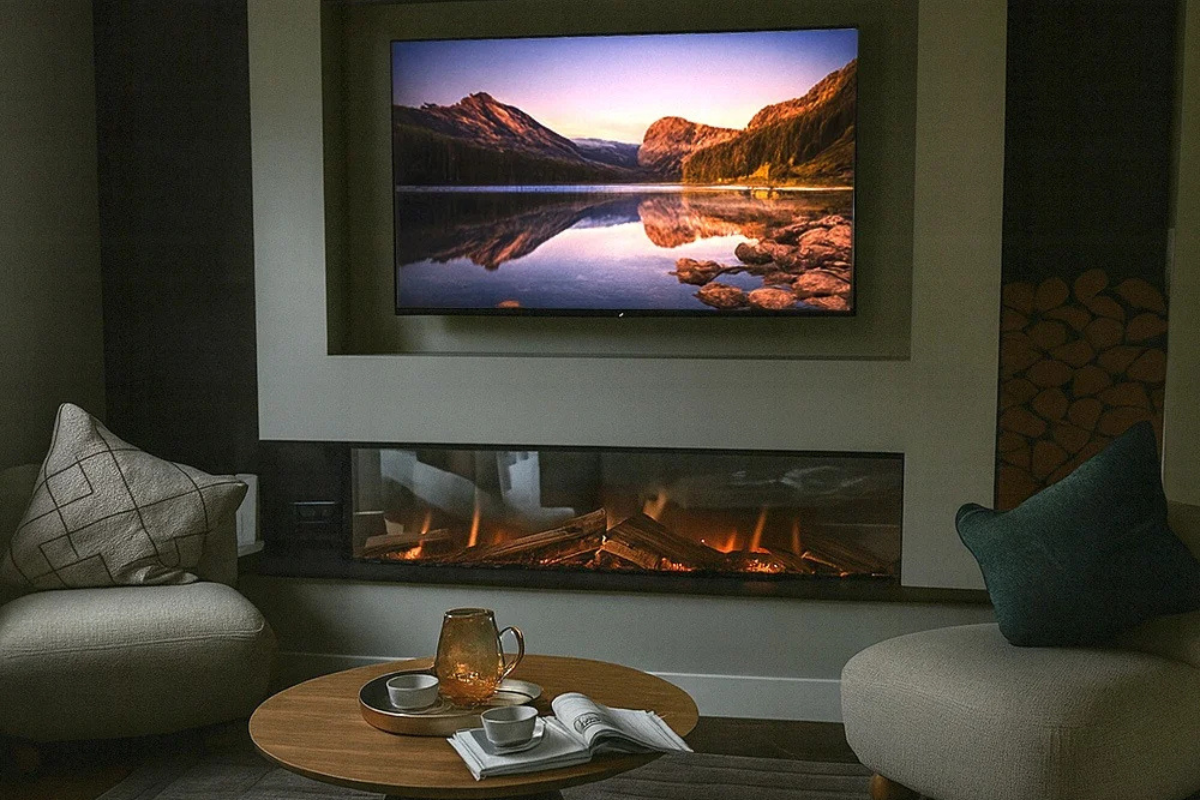
A 1500mm fire on the other hand visually anchors the wall and creates a single, cohesive focal point.
🛠️ The Fix: Use the rule-of-thumb ratio. Your fire’s width should generally be 70–100% of your TV’s width. For example, if you have a 65-inch TV (which is roughly 1440mm wide), a 1500mm wide fire like the Evonic Genesis 1500 or Gazco eReflex 150RW creates a perfectly balanced, premium look.
As a quick guide, here’s what size to go for based on your TV:
| TV Size | Recommended Fire Width |
|---|---|
| 50–55” | 1200–1500mm |
| 60–65” | 1400–1800mm |
| 70–75” | 1600–2000mm |
If in doubt, go wider. Premium media wall designs favour wider-format fires — and undersizing is the mistake most people regret.
👉 Get it right the first time: Filter media wall fires by your TV size and instantly see the right proportions.
👉 Need more advice? Read our guide to choosing the right size media wall fire for your TV.
❌ Mistake 2: Choosing the Fire Too Late
Many people design and build the stud wall, measure the leftover hole, and then try to find a fire that fits. This inevitably leads to compromises, dead space, or settling for a subpar fire because it’s the only one with the right dimensions.
🛠️ The Fix: Choose your fire first. Everything else works around it. Once you know the exact dimensions, clearance requirements, and glass-front style (1, 2, or 3-sided), your installer can construct the wall to frame it flawlessly.
👉 Start with a blank slate: Browse premium media wall fires designed specifically for built-in installations — so you avoid the sizing and realism mistakes most people make. Pick your fire first, then build your media wall around the one you love.
❌ Mistake 3: Cheap Flame Effect = Cheap-Looking Room

This is where most media walls go wrong. A flat, repetitive flame effect doesn’t just look cheap — it makes the entire wall feel like a budget installation, no matter how much you spent on the build.
Quick test: If the flame looks flat or “looped” in product videos, it will look worse in your living room. If it has visible depth and variation, you’re in the right category.
🛠️ The Fix: Invest in depth, fuel bed realism, and flame layering. Premium ranges utilise advanced projection and layered LED technology to create three-dimensional depth. This includes technologies like Celsi’s Electriflame VR, the app-controlled realism of Evonic’s E-Series and Genesis ranges, or the immersive Chromalight LED systems found in the Gazco eReflex collection.
👉 Spoilt for choice? Read our guide on how to pick the best flame effect for your media wall fire.
❌ Mistake 4: TV Placement That Feels ‘Off’
Mounting the TV too high is a classic error that leads to severe neck strain and a room that feels like a sports bar rather than a cosy lounge. On the other hand, placing it too close to the fire can disrupt the visual balance and, in rare cases, risk heat damage.
🛠️ The Fix: Plan your viewing height based on your sofa, not the wall. The centre of the TV should ideally be at eye level when seated. Leave a measured gap between the top of the fire and the bottom of the TV (check the manufacturer’s handbook for guidelines on gap size) to let both features breathe.
👉 Peace of mind: Read our guide to mounting a TV above your fireplace to get your spacing logic right the first time.
❌ Mistake 5: Ignoring Heat & Venting
“It’s an electric fire, so venting doesn’t matter, right?” Wrong. If you trap heat inside the cavity of your stud wall, you risk damaging the unit and wasting energy.
🛠️ The Fix: Make sure you select a fire designed specifically for media walls with a front heater. This pushes the warmth out into your living room rather than losing it in the wall cavity. Always check the manufacturer’s airflow and clearance guidelines before the plasterboard goes up.
❌ Mistake 6: Overcomplicating the Design

It’s tempting to add illuminated alcoves, wrap-around shelving, soundbar cutouts, and log storage all on one wall. But cramming too many features into a single space creates visual clutter.
🛠️ The Fix: The best media walls are simple and intentional. Let the pairing of a sleek, wide-format fire and your television do the talking. Clean lines and minimalist finishes will age much better than a wall packed with busy alcoves.
❌ Mistake 7: Treating It Like a DIY Feature (When It’s Not)
A media wall involves structural framing, plastering, and running electrical cables for both the TV and the fire. Winging it over a weekend usually results in visible cables, uneven plastering, or incorrect load-bearing support for your TV.
🛠️ The Fix: Shift your mindset: planning is more important than building. Even if you are an experienced DIYer, treat the planning phase with professional rigour. Map out your plug sockets, cable management routes, and stud placements before a single piece of wood is cut.
👉 Not sure where to start? If you’re unsure, we can connect you with trusted installers when you purchase your fire — so everything is built to spec from day one.
The “Get it Right First Time” Framework

Turn these common mistakes into a clean, foolproof system. Follow these steps in order:
Step 1: Lock in your fire (this determines everything).
This is the single most important decision. The size, flame quality, and glass style will dictate the proportions of your entire wall. This is why most homeowners start here — and why premium ranges like Evonic, Gazco eReflex, Dimplex Ignite, and Celsi are the safest place to begin.
Step 2: Size your TV around viewing distance.
Ensure it pairs well with your fire’s width. Read our guide to TV and media wall size matching if you're not sure.
Step 3: Design proportions.
Map out the exact gaps between the floor, fire, TV, and ceiling.
Step 4: Plan structure + electrics.
Route your hidden cables and ensure the stud work supports your TV bracket.
Step 5: Build / install.
Bring in the professionals to construct, plaster, and finish.
👉 Need a professional? Book your installation with us when you buy your media wall fire, and we’ll match you up with a trusted tradesperson in your area.
Before You Build Your Media Wall, Make Sure You Know:
- The exact width of your chosen fire
- The required clearance and ventilation gaps
- Whether you want 1, 2, or 3-sided glass
- Your TV size and viewing height
👉 If you don’t have these locked in yet, you’re not ready to build. Start by choosing your fire here →
What to Look for in a Media Wall Fire
When you're ready to start Step 1, don’t just look for any electric inset fire. Not all media wall fires are built for the same outcome. The right choice depends on the look you’re trying to achieve and how your wall will be used day-to-day.
Use this quick breakdown to find the best fit for your space:
🔥 Best for Ultra-Modern, Minimal Media Walls
👉 Evonic Fires / Celsi
If you’re aiming for a luxury, built-in look, this is the category most designers default to.

These fires are designed to integrate seamlessly into the wall, often with:
- ✅ Edge-to-edge glass for a frameless appearance
- ✅ Slim profiles that don’t dominate the space
- ✅ App control and customisable flame settings
Why it works:
Minimal media walls rely on proportion and precision. A bulky or overly styled fire ruins the effect — these ranges keep everything sleek and intentional.
- Best for: New builds, contemporary homes, open-plan spaces
- Typical choice: 1250mm–1800mm wide fires with 1 or 2-sided glass
👉 Start here: Explore Evonic & Celsi media wall fires →
🔥 Best for Deep Flame Realism & “Wow Factor”
If you want your media wall to feel like a true focal point — not just a TV wall — this is the category people upgrade to after seeing cheaper fires in person.

These fires prioritise:
- ✅ Layered flame effects with visible depth
- ✅ Detailed fuel beds (logs, crystals, embers)
- ✅ Multi-sided glass for panoramic views
Why it works:
This is what separates a “nice media wall” from one people comment on. The added depth and realism create movement, warmth, and presence in the room.
- Best for: Statement walls, feature rooms, high-spec renovations
- Typical choice: 1500mm+ wide, often 2 or 3-sided for maximum visual impact
👉 For high-end, built-in realism with maximum visual impact: Explore Gazco media wall fires →
👉 For advanced, hyper-realistic flame effects with flexible installation options: Explore Dimplex media wall fires →
🔥 Best for Flexible Installs & Practical Setups
👉 Focal Point, Solution Fires & BlazeBright
If your layout is constrained — awkward wall size, retrofit install, or tighter budget — you need flexibility over perfection.

These fires offer:
- ✅ A range of size variations
- ✅ Easy installation tolerances
- ✅ Straightforward controls and setup
Why it works:
Not every room allows for a full-width, perfectly symmetrical media wall. These options give you freedom to work around real-world limitations. This is where compromises are made — but done right, it can still look excellent.
- Best for: Retrofits, smaller rooms, budget-conscious projects
- Typical choice: 1000mm–1500mm, usually single-sided
👉 Start here: Browse flexible media wall fire options →
Top Features to Look For
- Wide-format designs: Fires that stretch 1250mm, 1500mm, or even 1800mm wide create the most striking, modern aesthetic.
- Multi-sided options: Many premium models offer 2-sided (corner) or 3-sided (panoramic) glass fronts, allowing the flames to be viewed from multiple angles in the room.
- Realistic flame tech: Look for deep fuel beds, real wood logs, and customisable LED colour spectrums.
- Front heat output: Essential for safe, efficient heating inside a stud wall cavity.
👉 Ready to narrow it down properly? Start with your ideal fire style, then filter by width and layout →
Your Build Starts With the Fire
A media wall is a permanent architectural feature in your home. Get the planning right, and it will completely transform your living space. Get it wrong, and you’ll immediately regret it.
Remember the golden rule of media walls: Don’t build the wall and hope for the best. Choose your fire first and design everything else around it.
Once you’ve got your exact fire dimensions and glass-front style locked in, the rest of the project falls perfectly into place.
Ready to find your centrepiece?
Most media wall mistakes happen before anything is built. Get the fire right, and everything else becomes straightforward. Get it wrong, and no amount of plastering or decorating will fix it.
👉 Shop All Media Wall Electric Fires – Filter by width, TV size, style, and price to find your perfect match.
Media Wall FAQs
What size fire do I need for my TV?
As a rule, your fire should be 70–100% of your TV’s width. If you’re unsure, go slightly wider—undersizing is the most common mistake.
Should you choose the fire or build the wall first?
Always choose your fire first. The size, style, and clearance requirements will determine the dimensions of your entire media wall.
Are electric fires safe to use in media walls?
Yes—provided you choose a model designed for media walls with a front heater and follow the manufacturer’s clearance and ventilation guidelines.
How high should a TV be above a media wall fire?
The centre of your TV should be at eye level when seated. Always leave a suitable gap above the fire—check manufacturer guidance for exact spacing.
What makes a media wall fire look realistic?
Look for layered flame effects, deep fuel beds, and visible depth. Flat or repetitive flames will make the entire wall look lower quality.
Looking for the most realistic flame tech on the market? Explore our top-tier ranges:
- 👉 Explore Evonic Fires – Best for award-winning realism, app control, and seamless edge-to-edge glass.
- 👉 Explore Dimplex Media Wall Fires – Best for advanced flame effects with flexible installation options and dependable performance
- 👉 Explore Gazco Media Wall Fires – Best for immersive, multi-sided depth and customisable Chromalight LED systems.
- 👉 Explore Celsi Media Wall Fires – Best for next-generation virtual reality flame projection and deep log beds.
Need help with the next steps? You might also like:
- 👉 Media wall fire buying guide
- 👉 Media wall living room layout ideas
- 👉 Planning a media wall step by step
- 👉 Guide to choosing the right media wall fire for your TV
- 👉 How to build a media wall
- 👉 Guide to media wall fire flame effects
- 👉 Media wall storage options and ideas
Need advice or want to browse in person?
- 📍 Visit us: Visit one of our showrooms to see a range of media wall fires in person and get expert, tailored advice
- 📧 Get in touch: Contact our team for help with choosing the right fire, delivery queries, installation, or finance questions
↑ Back to top | Jump to sections ↑
