We use cookies to improve your experience and our business. See our privacy/cookie policy or continue browsing to accept our use of cookies. View our cookie policy.
How Do You Install a Wall-Mounted Electric Fire?
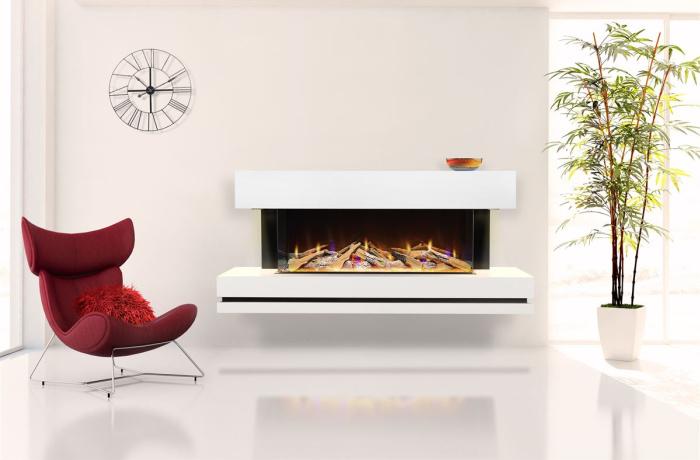
Wall-mounted electric fires are becoming an increasingly popular fireplace option in homes across the UK. It’s easy to see why. They’re modern, stylish and highly-practical. So, if you’re thinking about buying one, you might be wondering how they are installed. Keep reading and the Direct Fireplaces team will tell you everything you need to know…
Can you install a wall-mounted electric fire yourself?
Yes! It’s entirely possible to fit a wall-mounted electric fire yourself.
This is because wall-mounted electric fires don’t require any structural alterations to your home and are usually very straightforward to connect to your home’s electric network.
However, you may want to rope in a friend or family member to help if you’re going to be installing a larger wall-mounted electric fire, as some units can be on the heavier side.
It’s as easy as one, two, three!
When we say that fitting a wall-mounted electric fire is straightforward, we really mean it!
We’ve provided full details below, but fitting a wall-mounted electric fire is as easy as:
- Attaching a mounting bracket/hanging screws to the wall.
- Attaching the fire to the wall bracket/hanging screws.
- Plugging the fire in.
That’s it! Do you want to give it a go? Then keep reading…
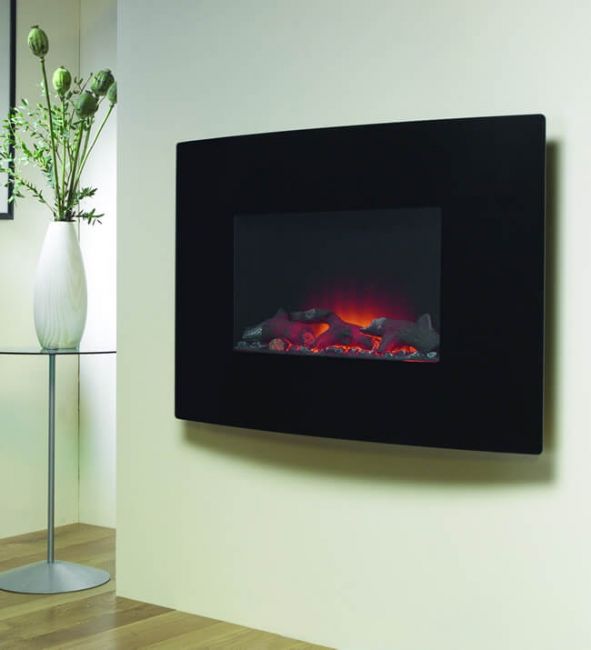
Suncrest Radius Wall-Mounted Electric Fire
How long does it take to fit a wall-mounted electric fire?
Given that this is a really straightforward job, provided you have the right tools, fitting a wall-mounted electric fire should take around half an hour.
What tools do you need to install a wall-mounted electric fire?
As we say, installing a wall-mounted electric fire is a fairly easy and straightforward job - provided you have the right tools.
The tools and items you’ll require to install a wall-mounted fire include:
- Instruction manual.
- An electric drill.
- Tape measure.
- Spirit level (also known as a carpenter’s level).
- Pencil.
- A Phillips head screwdriver.
- Stud finder.
- Pipe and cable finder.
- Rawl plugs.
Note - depending on the type of wall you’re fitting the fireplace to, you may not require the stud finder.
Once you’ve got your tools to hand, it’s time to start the installation!
Check how your wall-mounted electric fire is assembled.
However, before you start picking up the tools, you first want to conduct an inventory of your wall-mounted electric fire.
Many electric fireplaces of this type are shipped in two separate boxes; one will contain the flame effect screen, whilst the other will contain the firebox and mounting hardware.
So, make sure everything is present and correct before proceeding.
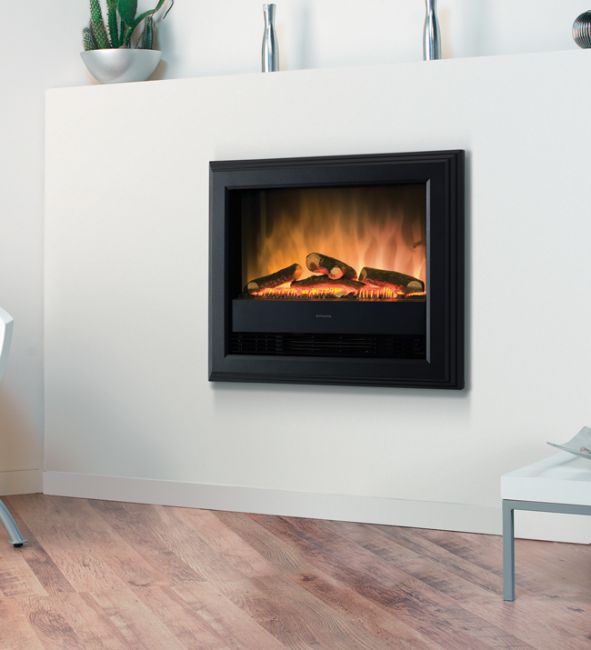
Dimplex Bach Electric Wall Fire
Check that the fireplace works
Another thing you should do before you begin installation, is to plug the fireplace in and check that it works.
Many fireplaces will allow you to do this prior to installation. It’s as easy as plugging it into a power socket and ensuring that the flame effect screen turns on and that the heating element operates correctly.
After all, you don’t want to install the fireplace only to find it’s not functional!
Locate the wall-mounted electric fire near to a plug socket
You’ve probably already got an ideal location for your wall-mounted fire in mind.
If so, great! But you should check the location you have chosen for the fire is located sufficiently close to a power socket.
Check that the fireplace’s power cable is able to reach from the location you have chosen, to the socket.
Alternatively, if you want to create a truly sleek finish, then you may want to move the plug socket so that it is hidden from view directly behind the fireplace. That way, there won’t be any pesky power cables in view.
If you do want to move the plug socket, we’d recommend getting an electrician to do this for you.
Note - don’t ever use an extension cable with an electric fire. Always plug your electric fire directly into a plug socket.
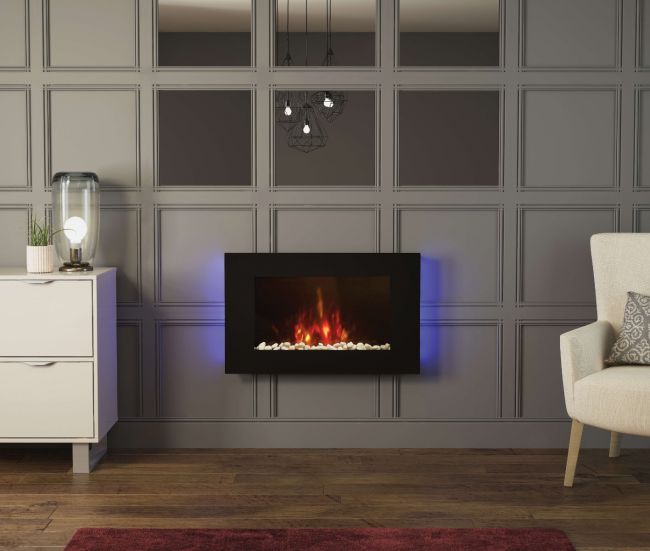
Flare Azonto Wall-Mounted Electric Fire
How high should a wall-mounted electric fire be?
In addition to checking that your fire is located close enough to a power socket, you’ll need to ensure that it is placed at the correct height on the wall too.
Many people like to have their wall-mounted fires to be at eye level when they are seated on their sofa or armchair. If that’s the kind of setup you’d like, then you’ll want to position your wall-mounted fire around 40-42” off the floor.
Note however, that if you want to place a TV above your wall-mounted fireplace, then you’ll want to make sure there is sufficient room to accommodate the TV. You should also ensure that there is enough space between the fireplace and the TV to prevent the TV from being damaged.
Check the fire’s distance from combustibles
You should ensure that the location you’ve chosen for your fireplace is sufficiently clear from any nearby combustibles.
As a general rule you should ensure that the heater - which normally sits at the bottom and front of an electric fire - is at least 400mm away from any combustibles such as fabrics.
Wall-mounted fireplace assembly
At this point, you’ll want to give some thought to the assembly of your fireplace, and the steps in which you do this.
For example, depending on your particular model, the instructions may tell you to install the wall bracket, fit the firebox to that, and then place the screen inside the firebox.
Other models will instruct you to place the screen inside the firebox, and then fit that complete unit to the wall bracket.
Either way, you’ll want to make sure you’re following the instructions correctly and assembling the fire in the right way.
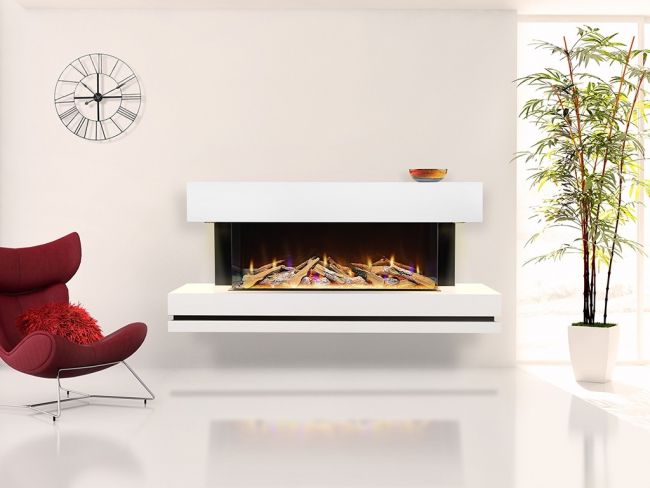
Celsi Electriflame VR Volare 1100 Electric Fire Suite
Attaching the wall bracket
Once you’ve done all of the above, it’s time to pick up your tools!
There are two main ways that a fire can be mounted to a wall:
- Using a wall bracket, which the fire then connects to
- Using hanging screws in the wall, from which the fire will hang.
Regardless of which type of hanging technique your fireplace requires, there are some points below which you should be aware of.
Check what type of wall you are mounting the fire to
It’s really important that you check what type of wall the fire is being mounted to.
There are a number of different types of walls that you may encounter:
- Solid walls - this type of wall will generally be made of brick or block (to form the interior wall), with a cavity and then the outside wall. The inner wall is generally plastered to create a solid finish which is then painted.
- Lathe and plaster - this type of wall is mainly found in pre-WWII homes and is made from thin horizontal strips of timber, which are nailed to larger vertical timber struts (it resembles a very dense wooden pallet type construction). This ‘framework’ is then plastered over.
- Stud walls - this type of wall features plasterboard sheets screwed to a timber frame. ‘Studs’ refers to the main vertical sections of timber that make up the timber frame.
- Dry lined walls - this type of wall involves dabbing adhesive across a load bearing wall and then attaching plasterboard to the wall.
Depending on what type of wall you have will determine your next steps.
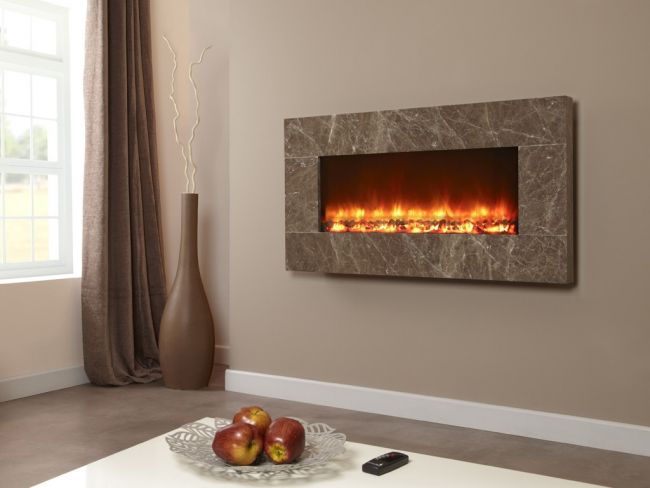
Celsi Electriflame XD Prestige Wall-Mounted Electric Fire
Mounting a fireplace to a stud wall
If you have a stud wall, then you will need to use a stud finder tool. This is to help you find the ‘studs’ (which are the vertical parts of the timber frame) into which you will drill the screws for the mounting bracket.
Fail to use a stud finder and you can easily miss the timber frame and end up drilling an unsightly hole through the plasterboard!
Mounting a fireplace to a lather and plaster wall
Lathe and plaster walls offer more of a challenge. Stud finders often don’t work with this type of wall construction, so in order to find the studs (the vertical timber struts), you’ll need to invest in a metal scanner tool.
Mounting a fireplace to a dry lined wall
Mounting a fireplace to a dry lined wall is generally straightforward. This is because you are simply drilling through plasterboard to a solid wall behind. There are no ‘studs’ to aim for.
Mounting a fireplace to a solid wall
As you’ll be drilling directly into bricks or blocks, mounting a fireplace to a solid wall is also straightforward.
You may want to check that your drill has a sufficiently strong bit if you’re going to be drilling into brickwork.
Note - regardless of the type of wall you are drilling into, it’s best practice to use a pipe and cable finder tool to make sure you don’t accidentally drill into a water pipe or power cable.
How do you tell what type of wall you have?
If you’re not too sure what type of wall you have, then there are two things you can do to check.
The first is to give the wall a tap with your knuckles. Stud or lathe and plaster walls will sound hollow.
Solid or dry lined walls will sound ‘solid’.
If you’re still not sure what type of wall you have, then drill a small exploratory hole in a discrete part of the wall. That will reveal what type of wall you’re dealing with.
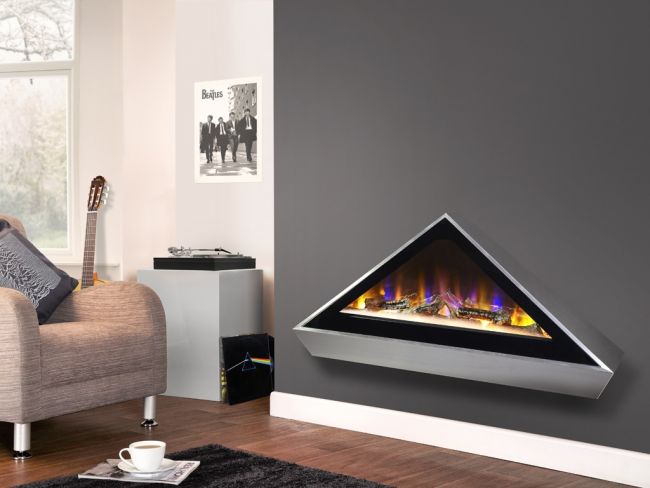
Celsi Electriflame VR Louvre Electric Wall Fire
Fitting the wall bracket
Many wall-mounted electric fires come with a template, which shows you where on the wall you need to drill holes.
Use this template along with a spirit level and pencil to mark on the wall where you’ll be fixing the wall bracket.
Once you’ve done this (and used your pipe and cable finder to make sure you’re going to be drilling in a safe place), it’s time to drill the holes.
With the holes drilled, you then need to insert rawl plugs into them.
If your fire doesn’t use a wall bracket, then you just need to fit hanging screws into the rawl plugs, leaving them proud of the wall by about 5-10mm so that you can hang the fire on them.
But if you’ll be using a wall bracket, you need to hold this in place against the wall, lining it up against the holes you’ve made - then fit the screws.
Attaching the fire
With the wall bracket or hanging screws in place, you need to attach the fire to it.
As we mentioned earlier, depending on the particular fire you have chosen, you will either need to fit the firebox to the wall bracket first - and then place the screen in the firebox - or you’ll need to fit the firebox and screen as a complete unit to the wall bracket.
Should you have chosen a larger wall-mounted fire, then you may want to draft in some help for this stage. It can be a struggle fixing the fire to the wall bracket on your own.
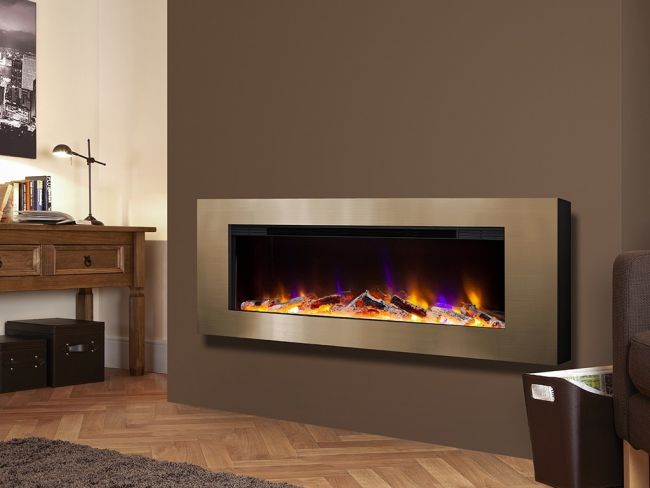
Celsi Electriflame VR Basilica Electric Wall Fire
Plugging it in
Once the fire is mounted on the wall, you’ll want to plug it in and test it out. Once you’re satisfied everything is okay, you’ll want to do one last thing - tidy up the cabling.
If you didn’t opt to move the plug socket behind the fireplace, then you’ll want to make sure that the cable that connects your fireplace to the plug socket looks as neat as possible.
For a tidy finish, you can tack the power cord to the wall and skirting board to the point it reaches the plug socket. Alternatively, you may want to use paintable wire covers. These can help to camouflage the power cord.
Enjoy!
And, that’s it! With your fireplace safely and securely mounted on the wall, it’s time to kick back and relax.
By the way - we always love seeing people’s DIY triumphs here at Direct Fireplaces - so, if you’d like to show the world your new wall-mounted electric fireplace, tag us into your pictures on Instagram and we’ll share them with our audience!
Popular wall-mounted electric fires
Do you want a wall-mounted electric fire, but need some inspiration? Then check out some of our most popular wall-mounted electric fires below.
Elgin & Hall Pryzm Huzton Wall-Mounted Timber Electric Fireplace Suite
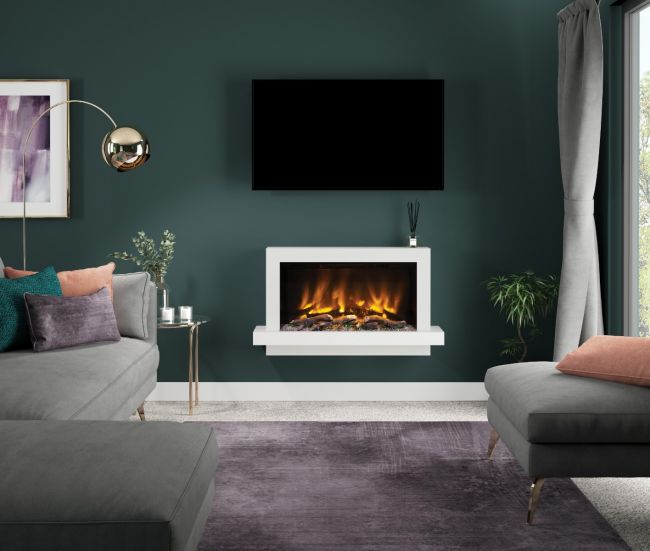
Elgin & Hall Pryzm Huxton Wall-Mounted Timber Electric Fireplace Suite
The Elgin & Hall Pryzm Huxton takes fireplace design to a whole new level, creating a stand out focal point in any living room.
Not only is it beautifully designed and crafted, but the Huxton is packed with plenty of dynamic features.
A button click on the remote control ignites gentle illumination which glows in a variety of shades across the expanse of the dramatic, elongated fuel bed.
The Huxton's 5D flame effect and 2kW instant radiating heat combine to create a stunning fireplace that'll make your room feel warm and cosy during even the coldest months of the year.
Elgin & Hall Pryzm Camino Wall-Mounted Timber Electric Fireplace Suite
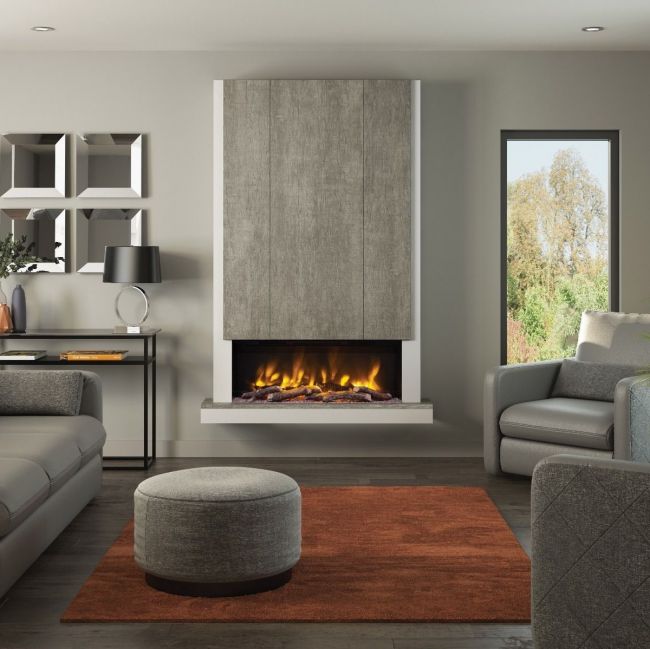
Elgin & Hall Pryzm Camino Wall-Mounted Timber Electric Fireplace Suite
Elgin & Hall's Pryzm Camino is available in two stunning finishes and perfectly incorporates the Pryzm electric fire to create a beautiful, instant centrepiece.
The Camino features LED mood lighting situated under the plinth which can be configured with infinite colour and brightness settings by using a downloadable app on your smartphone or tablet.
What's more, the Camino can be controlled via your voice using either Amazon Alex or Google Assistant. This truly is a state-of-the-art wall-mounted fireplace.
Flamerite Luca 1500 Wall-Mounted Electric Fire
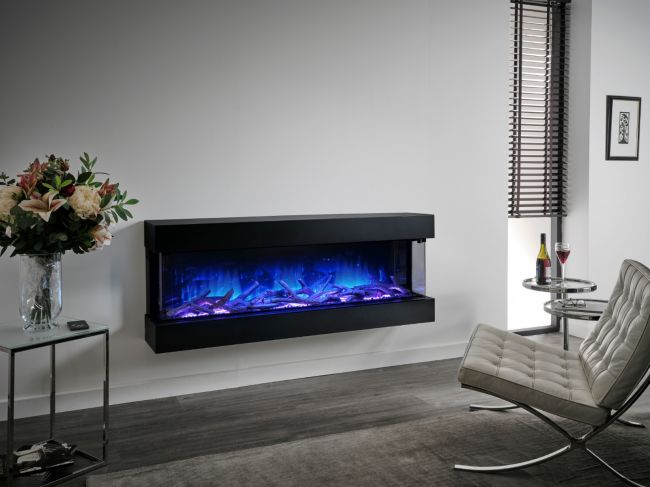
Flamerite Luca 1500 Wall-Mounted Electric Fire
Just look at how stunning this fire is! Flamerite have truly excelled themselves with the Luca 1500.
This is a stunning panoramic 3-sided wall fire which will make a stunning addition to any home.
It features OmniGlide 2 position front glass, a thermostatically controlled 750W/1500W fan heater and can be controlled via a smartphone app (manual control is available too).
OER Alpine Wall-Mounted Electric Fire
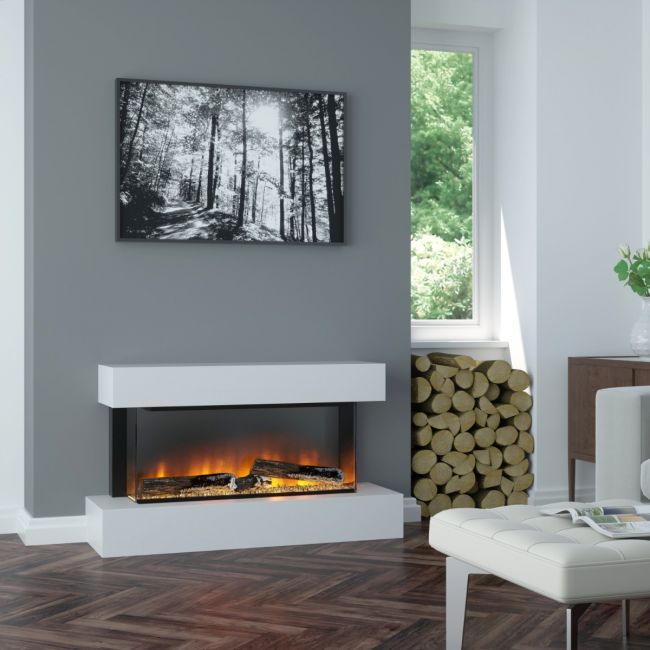
OER Alpine Wall-Mounted Electric Fire
With over 30 years' experience designing and manufacturing fireplaces, OER certainly knows what makes a stunning and attractive fireplace.
That's evident in the Alpine, which will truly become the centrepiece of any living room.
The Alpine comes complete with a white riven laminate shelf and base complimented by Woodhaven grey side panels. It also has a glass fronted 3-sided fire with thermostatic control included.
Plus, the front glass can be removed to create an open-front appliance.
It's also easy to install, with the required fixing brackets supplied.
Shop wall-mounted electric fires at Direct Fireplaces now
For more installation advice, buying guides and information, read the Direct Fireplaces blog…
Guide to Wall Mounted Fires | What Types of Fires Can You Use in a Media Wall? | Can You Put a TV Over a Fireplace?
[related_products is_auto_added="1"]admin
Latest posts by admin (see all)
- Electric Fireplace Inserts Buying Guide - March 27, 2023
- What Types of Flueless Fires Are There? - February 23, 2023
- What Are the Best Contemporary Gas Fires? - January 17, 2023

